Roasting Mistake Checker
-
Leaving Skin Wet
Not drying the skin thoroughly before roasting
-
Rinsing Raw Chicken
Washing the bird under the tap
-
Overstuffing Cavity
Packing stuffing too tightly inside
-
No Thermometer
Guessing doneness without checking temperature
-
Skipping Resting Time
Cutting immediately after removing from oven
-
Using Low Heat Too Long
Roasting at temperatures below 200°C (400°F)
-
Neglecting Fat
Not using butter or oil on the skin
-
Dry Brining Overnight
Refrigerating uncovered on a wire rack
-
Loose Aromatics Only
Placing herbs/lemons loosely in cavity
-
Using Instant-Read Thermometer
Checking breast at 74°C and thigh at 82°C
-
Resting 15-20 Minutes
Letting juices redistribute before carving
-
High Heat Roasting
Cooking at 200-220°C (400-425°F)
-
Butter/Oil Rub Under Skin
Seasoning both sides of the skin
Your Score
There is nothing quite as disappointing as pulling a perfectly golden bird out of the oven, only to slice into it and find the meat as dry as sawdust. You followed the recipe. You seasoned it. You waited. So why did it fail? The truth is that roasting a chicken is less about following strict rules and more about avoiding specific pitfalls that ruin texture and flavor. Most home cooks make the same errors because they rely on intuition rather than understanding how heat interacts with poultry. If you want juicy meat and shattering crisp skin every time, you need to know exactly what *not* to do.
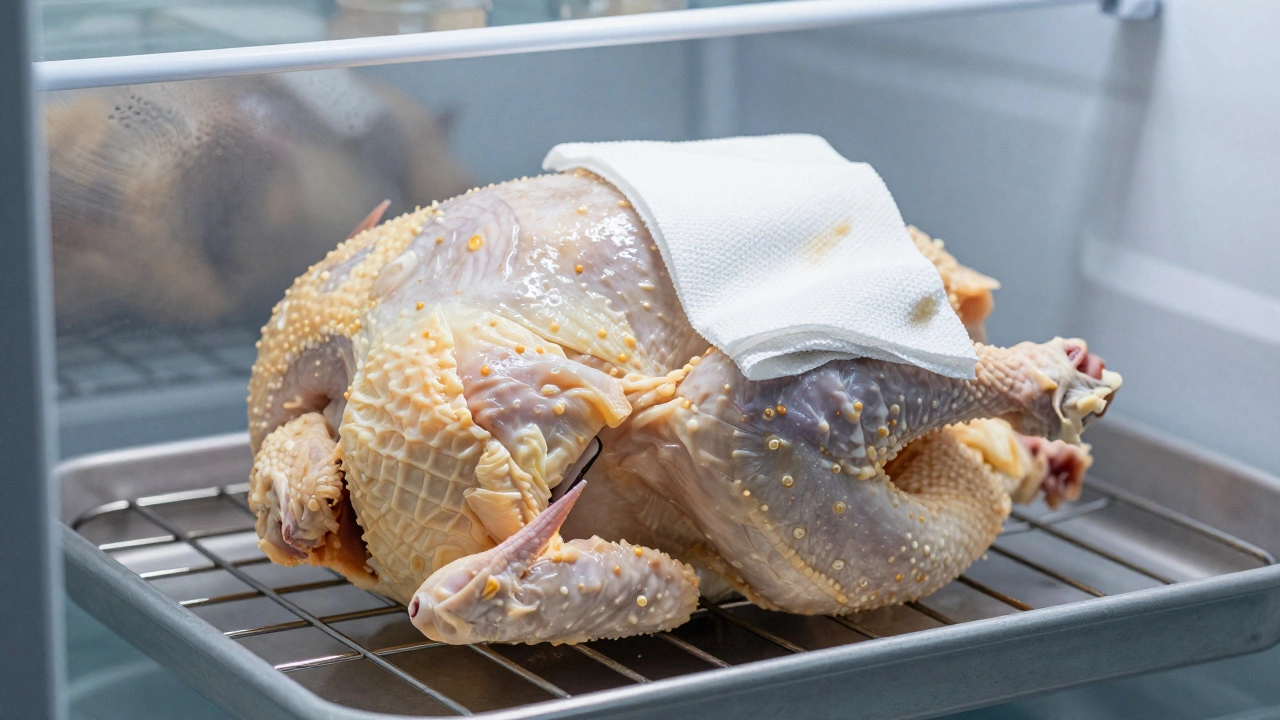
Skipping the Drying Step
The single biggest mistake people make happens before the chicken even hits the oven. You buy a fresh or thawed bird, rinse it (which we will get to), pat it down lightly, and put it in the pan. This leaves surface moisture on the skin. Water boils at 100°C (212°F). As long as that water is present, the skin cannot brown properly because it stays stuck at boiling temperature instead of reaching the higher temperatures needed for caramelization. This results in pale, soggy skin that tastes like boiled rubber.
To fix this, you must dry the chicken thoroughly. Use paper towels to press firmly against the skin until no more moisture comes off. For the best results, place the dried chicken on a wire rack set over a baking sheet and leave it uncovered in the refrigerator overnight. This technique, often called "dry brining," pulls moisture out of the skin through osmosis while allowing salt to penetrate the meat. By the time you roast it, the skin is desiccated and ready to crisp up immediately upon hitting the heat.
Rinsing the Bird
Many of us were taught to rinse raw chicken under the tap to "clean" it. This is not just unnecessary; it is dangerous. Rinsing spreads bacteria, such as Salmonella and Campylobacter, onto your sink, countertops, and nearby utensils through aerosolized water droplets. The USDA and other food safety authorities explicitly advise against this practice. Cooking the chicken to the correct internal temperature kills all harmful bacteria. Trust the heat, not the faucet. Keeping the kitchen safe is part of the process, and skipping the rinse saves you from cross-contamination risks.
Overstuffing the Cavity
It is tempting to stuff the cavity with lemon, herbs, garlic, or bread dressing to infuse flavor. However, packing the cavity too tightly creates an insulation layer around the breast meat. Heat travels slowly through dense stuffing, which means the outer parts of the chicken cook faster than the inner parts near the cavity. This uneven heat distribution can lead to overcooked breasts while the thighs remain undercooked, or vice versa. If you want aromatic flavors, place a few sprigs of rosemary, thyme, or halved lemons loosely inside the cavity. Do not pack it tight. Leave air space so heat can circulate evenly around the entire bird.
Ignoring the Temperature Gradient
Chicken breasts and thighs have different muscle structures and fat contents. Breast meat is lean and dries out quickly if cooked past 74°C (165°F). Thighs and legs contain more connective tissue and fat, requiring higher temperatures to break down collagen into gelatin. If you cook the whole bird uniformly, you either end up with dry breasts or tough, chewy thighs. The solution is to acknowledge this difference. Some chefs recommend spatchcocking the chicken-removing the backbone and flattening it out-so the breasts and thighs sit at the same level relative to the heat source. This ensures both parts cook at similar rates. If you are roasting a whole bird traditionally, position it so the breast faces away from the direct heat if using a broiler, or rotate the pan halfway through cooking.
| Mistake | Why It Fails | Better Approach |
|---|---|---|
| Wet Skin | Prevents browning; causes steaming | Dry thoroughly with paper towels; refrigerate uncovered overnight |
| Rinsing Raw Meat | Spreads bacteria via splash zone | Skip rinsing; rely on proper cooking temperature |
| Tight Stuffing | Insulates meat; causes uneven cooking | Place aromatics loosely; leave air gaps |
| No Thermometer | Guesswork leads to dryness or undercooking | Use an instant-read thermometer; target 74°C for breast, 82°C for thigh |
| Crowded Pan | Steams the bottom; prevents crisping | Use a roasting rack; elevate the bird above juices |
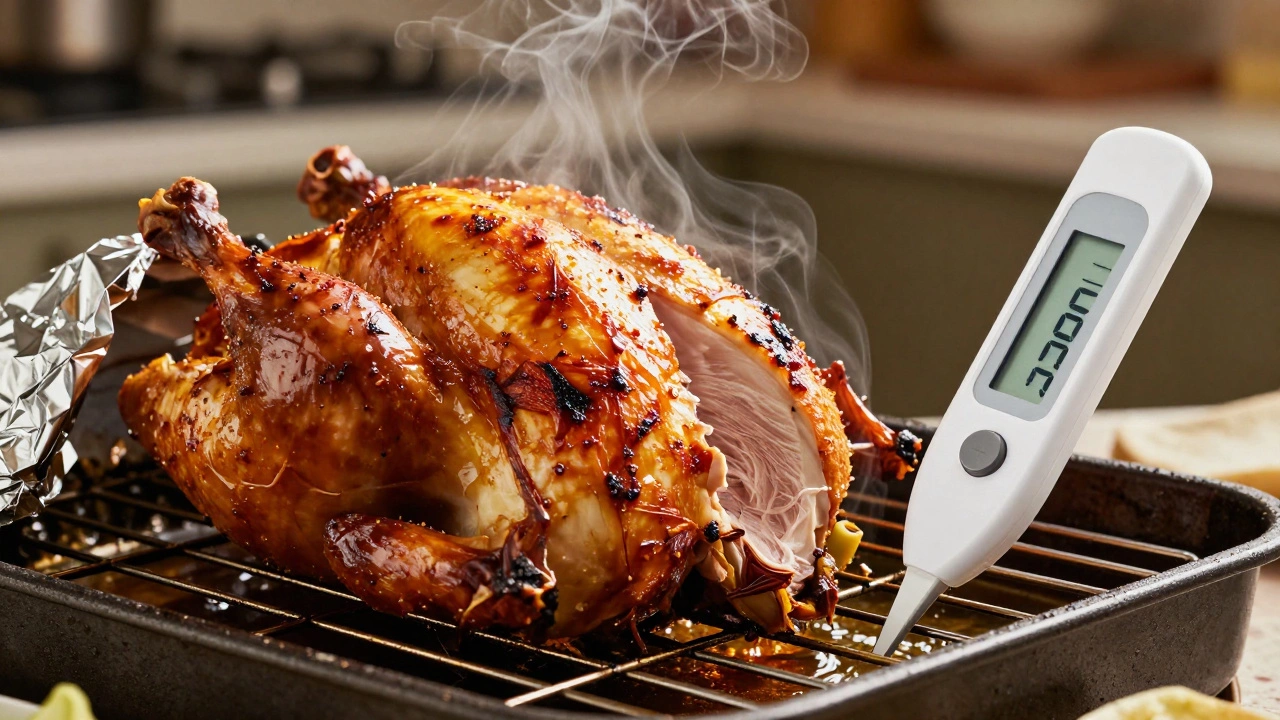
Cooking Without a Thermometer
Relying on cooking time alone is a recipe for disaster. Every oven runs differently, and every chicken varies in size and starting temperature. A two-kilogram bird taken straight from the fridge will take longer than one that has rested at room temperature. Guessing based on minutes per pound is inaccurate. Instead, use an instant-read digital thermometer. Insert it into the thickest part of the breast, avoiding the bone. Pull the chicken when the breast reads 74°C (165°F) and the thigh reaches 82°C (180°F). The residual heat will continue to cook the meat slightly after removal, ensuring juiciness without risking undercooking. Bones conduct heat rapidly, so measuring near a bone gives false high readings. Aim for the center of the muscle mass.
Neglecting Resting Time
You pull the hot chicken from the oven, carve it immediately, and watch the juices run out onto the cutting board. Those juices are moisture that should stay in the meat. When meat cooks, the proteins contract and squeeze liquid toward the center. Cutting into it right away releases that pressure instantly, leaving the fibers dry. Letting the chicken rest for at least 15 to 20 minutes allows the proteins to relax and reabsorb some of those juices. Tent the bird loosely with foil to keep it warm, but do not seal it tightly, or the steam will soften your hard-won crispy skin. Resting is not optional; it is essential for texture.
Using Low Heat for Too Long
Some recipes advocate for low-and-slow roasting to keep the meat moist. While this works for tougher cuts like pork shoulder, it often fails for chicken skin. Low temperatures do not provide enough energy to render the fat under the skin effectively or to create the Maillard reaction responsible for deep browning and complex flavors. If you roast at 150°C (300°F) for hours, you may end up with gray, flabby skin. A higher temperature, around 200°C to 220°C (400°F to 425°F), ensures rapid rendering and crisping. To prevent the breast from drying out during high-heat roasting, consider covering it with foil for the first half of cooking, then removing the foil to let it brown. This balances tenderness with texture.
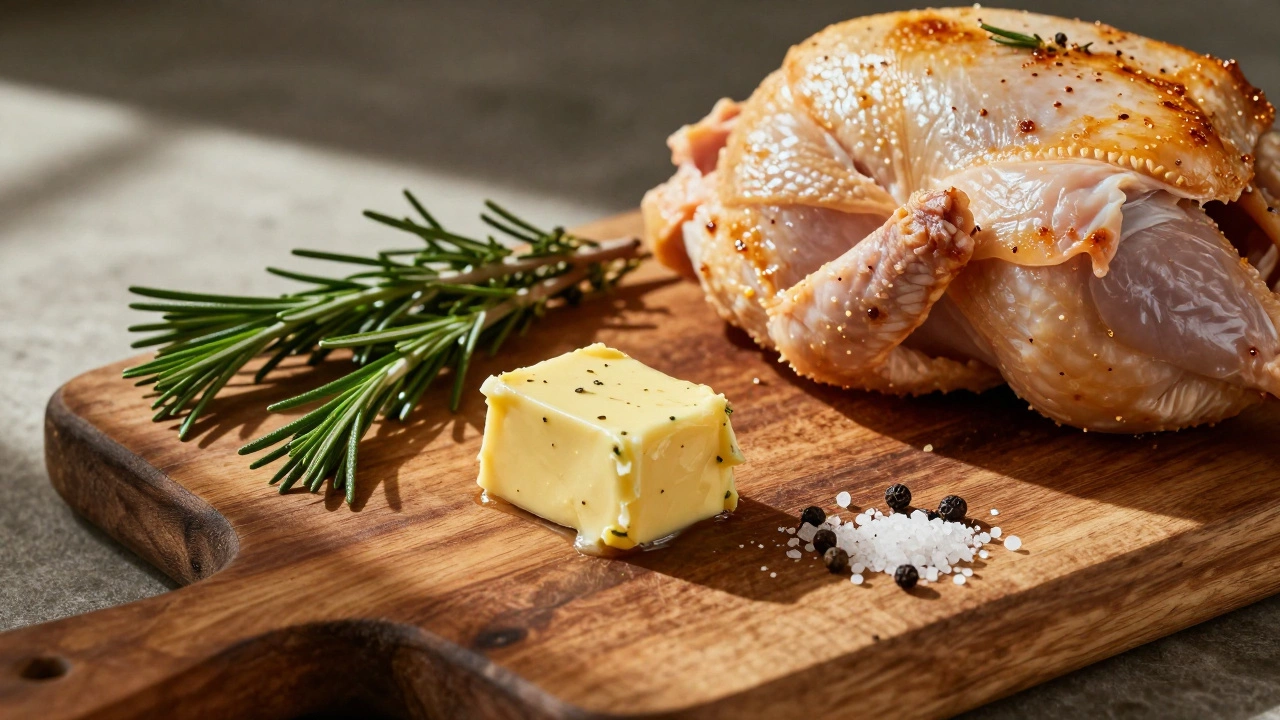
Forgetting the Fat
Butter or oil is not just for flavor; it is a conductor of heat and a carrier for seasoning. Rubbing the skin with softened butter mixed with salt, pepper, and herbs helps the skin brown evenly and adds richness. Dry salt alone draws out moisture but does not promote browning as effectively as fat. Make sure to get seasoning under the skin as well by gently loosening the membrane between the skin and the breast meat. Rubbing herb paste directly onto the meat infuses flavor from the inside out. Without adequate fat, the skin can become brittle rather than crisp, and the flavor profile remains one-dimensional.
Should I truss my chicken before roasting?
Trussing ties the legs and wings close to the body. While it looks traditional, it often traps heat around the breast, causing it to cook faster than the thighs. For more even cooking, many modern chefs recommend skipping trussing or simply tucking the wing tips behind the shoulders. Leaving the legs loose allows air to circulate better around the darker meat, promoting even browning and cooking.
Can I roast a frozen chicken?
You should never roast a frozen chicken. The exterior will burn long before the interior reaches a safe temperature. Always thaw the chicken completely in the refrigerator before cooking. Plan ahead: allow approximately 24 hours of thawing time for every 2.5 kilograms of weight. Partially frozen birds result in uneven cooking and significant food safety risks.
Why is my chicken skin rubbery?
Rubbery skin usually indicates insufficient drying or low cooking temperature. Moisture on the surface prevents the skin from reaching the temperatures needed for crisping. Ensure the skin is bone-dry before seasoning and roasting. Additionally, roasting at a high enough temperature (above 200°C/400°F) helps render the subcutaneous fat, transforming the skin from rubbery to crisp.
Do I need to marinate the chicken overnight?
Marinating whole chickens is generally ineffective because the marinade cannot penetrate deeply into the meat. Salt, however, does penetrate if given time. A simple dry brine of salt applied several hours or overnight is far more effective than a wet marinade. It seasons the meat throughout and improves moisture retention without altering the texture negatively.
How do I know if the chicken is done without a thermometer?
While a thermometer is the most reliable method, you can check doneness by piercing the thickest part of the thigh. The juices should run clear, not pink. Additionally, the leg joint should move freely in its socket. However, these methods are subjective and prone to error. Investing in a cheap digital thermometer is the best way to guarantee safety and quality.