Chicken Breast Doneness & Safety Calculator
Perfect Pull (Recommended)
Pull at 150°F - 155°F
Traditional Safe
Pull at 165°F+
Result Analysis
Adjust the temperature or resting time above and click calculate to see if your chicken is safe and juicy.
There is nothing worse than biting into a piece of chicken breast that tastes like cardboard. It happens to the best of us. You spend twenty minutes prepping, you season it nicely, and then-poof-it comes out tough, stringy, and completely dry. But here is the good news: cooking chicken breast perfectly is not magic. It is science, and once you understand the mechanics, you will never eat dry chicken again.
The problem with chicken breast is simple biology. It is a lean muscle with very little fat. Unlike a thigh or a drumstick, which have connective tissue and fat that keep them moist during long cooks, the breast relies entirely on its protein structure to hold water. When you overheat it, those proteins tighten up like a sponge being wrung out, squeezing every drop of moisture onto your cutting board. Your job is to stop that squeeze before it starts.
Why Does Chicken Breast Dry Out So Easily?
To fix the problem, we first need to look at what causes it. Chicken breast is composed mainly of myofibrillar proteins. As heat is applied, these proteins denature-they unfold and then bond together. This process is irreversible. If you cook the chicken past a certain temperature point, the bonds become too tight, and the water trapped inside has nowhere to go but out.
Most people rely on visual cues to tell if chicken is done. They wait for the pink to disappear or for the juices to run clear. These are unreliable indicators. By the time the center looks fully white and opaque, you have likely already pushed the internal temperature well past the safe zone, leaving the meat in the "dry zone." The only way to know for sure is to use a thermometer. Guessing leads to disaster; measuring leads to dinner.
The Secret Weapon: Brining and Salting
If you want insurance against dryness, start before you even turn on the stove. Brining is the most effective method for ensuring juicy results. There are two ways to do this: wet brining and dry brining (also known as salting).
Wet Brining involves submerging the chicken in a solution of water and salt. A standard ratio is one cup of kosher salt per gallon of water. You can add sugar, herbs, or spices for extra flavor, but the salt is the key player. The salt breaks down some of the muscle proteins, allowing the meat to absorb and retain more water during cooking. Even if you accidentally overcook the chicken slightly, the extra moisture buffer means it will still be tender. Leave the breasts in the brine for 30 minutes to an hour. Any longer, and the texture can start to feel mushy.
Dry brining is simpler and requires no extra liquid. Just generously salt both sides of the chicken breast and leave it uncovered in the fridge for at least 45 minutes, or up to 24 hours. The salt draws out moisture initially, which then dissolves the salt and gets reabsorbed into the meat, seasoning it deeply and altering the protein structure just enough to hold onto water better. This method also helps dry out the surface, which is crucial if you plan to pan-sear the chicken for a nice crust.
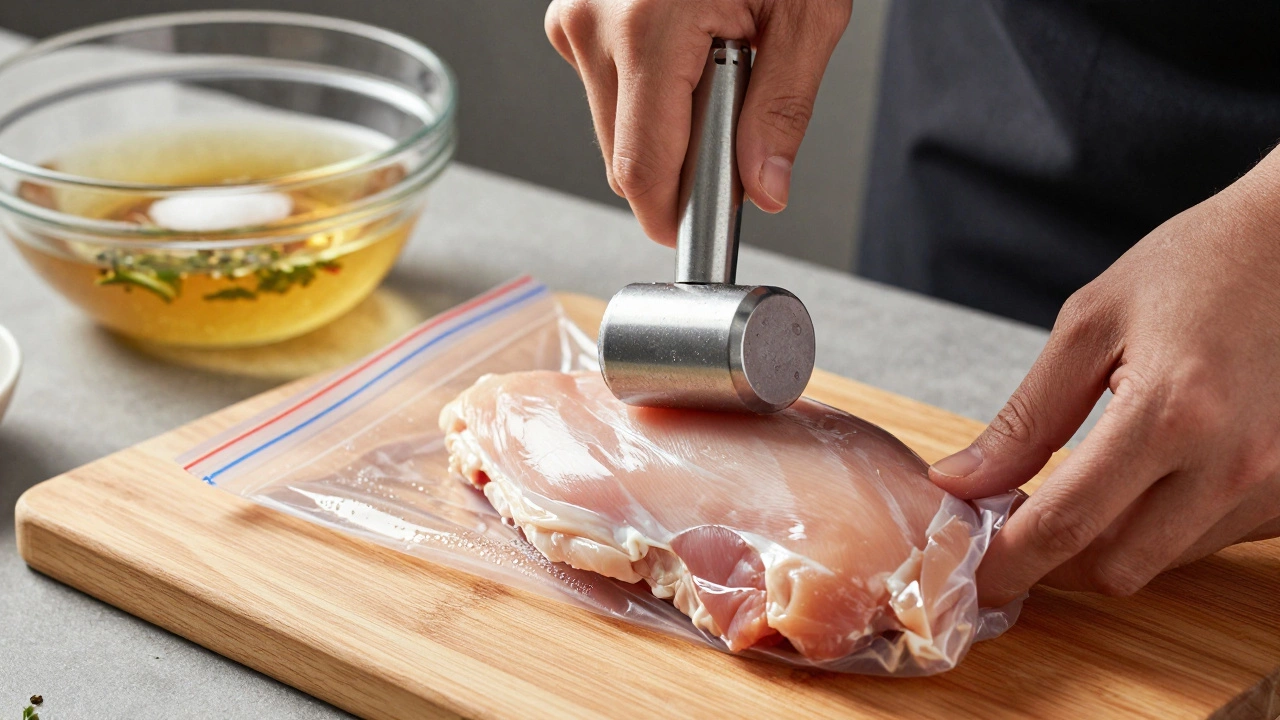
Pounding to Even Thickness
Have you ever cooked a chicken breast where the thin end was rubbery while the thick end was finally done? That is because uneven thickness leads to uneven cooking. Heat travels through the thickest part last. By the time the center reaches a safe temperature, the thinner edges have been cooking for much longer than necessary.
The fix is mechanical. Place your chicken breast between two sheets of plastic wrap or inside a zip-top bag. Use a meat mallet, a rolling pin, or even the bottom of a heavy skillet to pound the breast until it is an even thickness throughout. Aim for about half an inch to three-quarters of an inch. This does two things: it speeds up the cooking time significantly, reducing the window for error, and it ensures that every bite cooks at the same rate. Plus, a flatter breast fits better in a pan and is easier to slice later.
The Best Cooking Methods for Moisture
Not all cooking methods are created equal when it comes to delicate poultry. Some techniques are forgiving, while others require constant attention.
- Pan-Searing: This is great for speed and flavor. Use a heavy-bottomed skillet like cast iron or stainless steel. Heat oil over medium-high heat until it shimmers. Sear the chicken for 3-4 minutes per side. Because the outside gets hot quickly, you must monitor the internal temperature closely. This method works best with pounded breasts.
- Baking/Roasting: Baking is hands-off but risky if you don't watch the time. Oven temperatures vary wildly. To mitigate this, bake at a higher temperature, around 400°F (200°C), rather than the traditional 350°F. Higher heat cooks the chicken faster, giving the proteins less time to tighten up. Covering the pan with foil for the first half of the cooking time traps steam, acting like a gentle poach, then uncovering it allows for browning.
- Sous Vide: If you have a sous vide machine, this is the gold standard for consistency. You set the water bath to exactly 145°F (63°C) and let the chicken cook for 1 to 2 hours. The chicken cannot overcook because the water temperature never exceeds the target internal temperature. The result is uniformly juicy meat from edge to edge. Afterward, you can quickly sear it in a hot pan for color.
- Poaching: Often misunderstood as boring, proper poaching yields incredibly tender results. Bring a pot of water or broth to a simmer, then reduce the heat so the liquid is barely moving. Add the chicken and cook gently for 10-12 minutes. This low-and-slow approach prevents the shock of high heat, keeping the proteins relaxed.
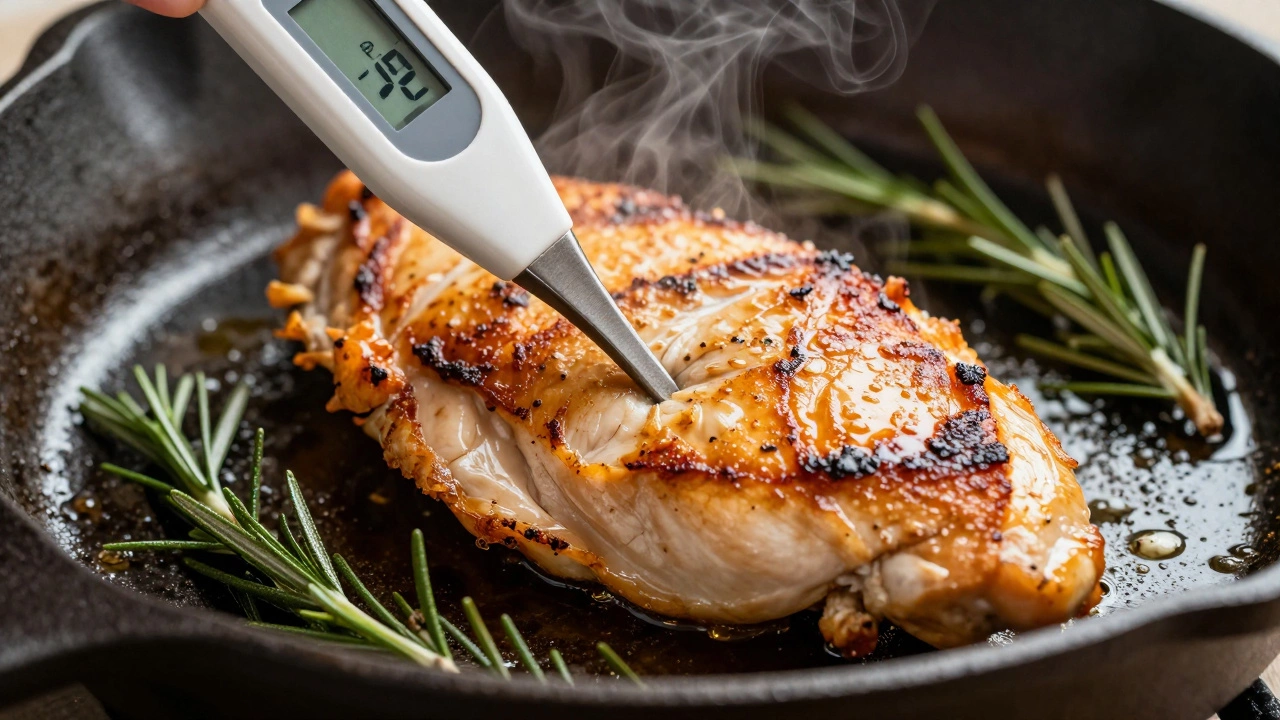
Temperature Control: The Game Changer
This is the single most important tip in this entire guide. You need an instant-read digital thermometer. Analog thermometers are often inaccurate and slow. Digital ones give you a reading in seconds.
For decades, food safety guidelines suggested cooking chicken to 165°F (74°C). While this is safe, it is also the temperature where chicken breast becomes dry. Here is the secret: bacteria die instantly at 165°F, but they also die gradually at lower temperatures if held there for a specific amount of time. This is called pasteurization.
You can safely remove chicken breast from the heat at 150°F to 155°F (65°C to 68°C). Why? Because of carryover cooking. Once you take the meat off the heat source, the residual heat continues to raise the internal temperature by about 5 to 10 degrees. If you pull it at 155°F, it will rest up to 165°F, killing any potential pathogens while retaining maximum juiciness. Pulling it at 165°F directly from the pan usually results in an internal temperature of 170°F+, which is dry.
| Internal Temp (Pull) | Final Rest Temp | Texture Result | Risk Level |
|---|---|---|---|
| 145°F (63°C) | ~155°F | Very Juicy, slightly pink | High (unless held) |
| 150-155°F (65-68°C) | ~160-165°F | Juicy, White | Low (Safe with resting) |
| 165°F (74°C) | ~170-175°F | Dry, Firm | None |
| 175°F+ (80°C+) | 180°F+ | Stringy, Tough | None |
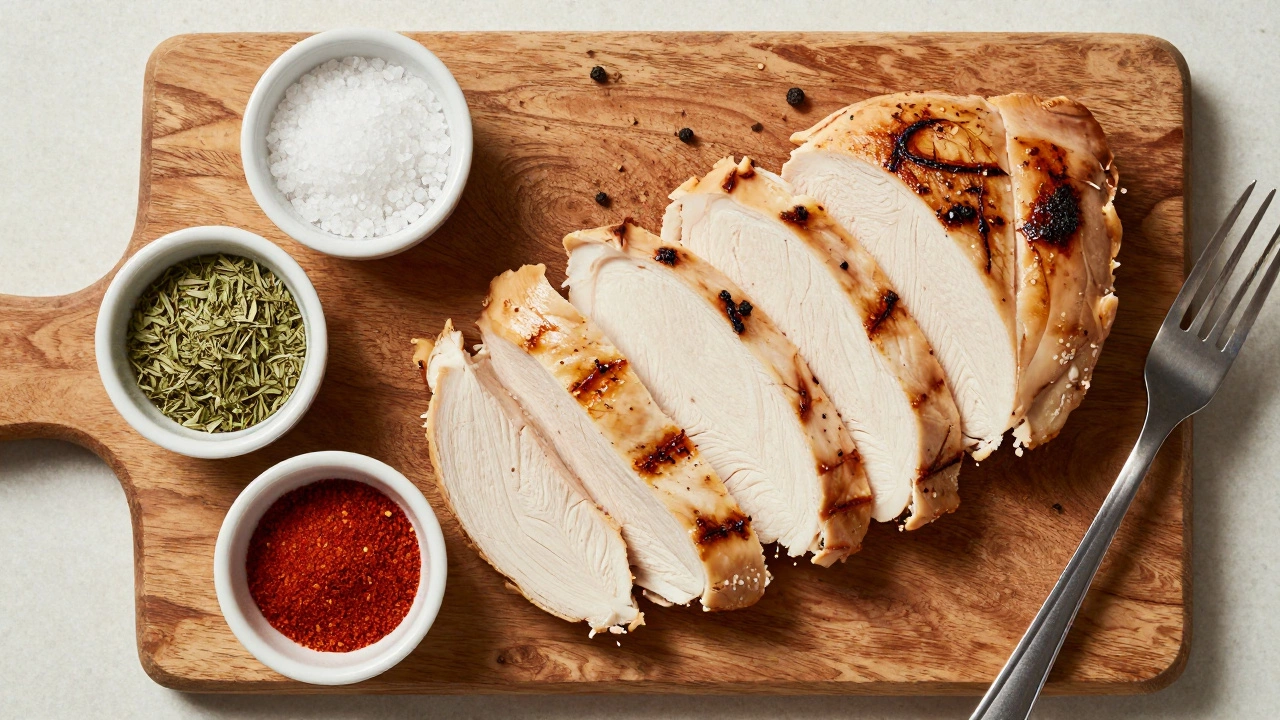
The Importance of Resting
You might think you can cut into your chicken immediately after it hits the pan, but resist the urge. Resting is not optional if you want juice. When chicken cooks, the heat forces the juices toward the center of the meat. If you cut into it right away, those concentrated juices spill out onto the plate, leaving the meat dry.
Let the chicken rest for at least 5 to 10 minutes after cooking. During this time, the muscles relax, and the juices redistribute evenly throughout the fibers. Tent the chicken loosely with aluminum foil to keep it warm without trapping too much steam, which could make the skin soggy if you were aiming for crispness. This step takes zero effort but makes a massive difference in the final eating experience.
Common Mistakes to Avoid
Even with the right tools, habits can sabotage your success. One common error is overcrowding the pan. If you put too many chicken breasts in a skillet at once, they will steam each other instead of searing. Steam creates a humid environment that prevents browning and leads to a gray, boiled exterior. Cook in batches if necessary.
Another mistake is starting with cold chicken straight from the fridge. Cold meat lowers the temperature of your pan, causing uneven cooking. Take your chicken out 15-20 minutes before cooking to let it come closer to room temperature. This isn't about food safety-it's about thermal equilibrium. Warmer chicken cooks more evenly and faster.
Finally, avoid piercing the chicken with a fork while cooking. Every hole you poke is a tunnel for moisture to escape. Use tongs to flip the chicken, not utensils that penetrate the flesh.
Can I cook chicken breast in the microwave without it being dry?
Yes, but you have to be careful. Microwaves heat unevenly and can easily boil the moisture out of the meat. To prevent this, place the chicken on a microwave-safe plate, cover it with a damp paper towel, and cook on medium power (50%) rather than high. Check frequently. The damp towel creates steam, which helps keep the surface moist. However, you won't get any browning or flavor development this way, so it's best for quick reheating or basic meals.
What is the best way to season chicken breast so it stays flavorful?
Season generously. Chicken breast is bland on its own. Use a mix of salt, black pepper, garlic powder, paprika, and dried herbs like oregano or thyme. Salt should be applied at least 15 minutes before cooking to allow it to penetrate the meat. For extra flavor, consider marinating the chicken for 30 minutes to 2 hours in an acidic mixture like lemon juice, yogurt, or buttermilk. The acid helps tenderize the surface while infusing flavor.
Why does my chicken breast turn out chewy even if I didn't overcook it?
If the temperature was correct but the texture is still chewy, the issue might be the age or quality of the chicken. Older birds or those that have been frozen for a long time can have tougher muscle fibers. Additionally, if you did not pound the breast to an even thickness, the thicker parts may have tightened up excessively. Another factor is slicing against the grain. Cutting across the muscle fibers shortens them, making the meat feel more tender in your mouth.
Is it safe to eat chicken that is slightly pink inside?
Color is not a reliable indicator of doneness. Chicken can remain pink even when fully cooked due to factors like the bird's diet, age, or the presence of myoglobin. Conversely, it can look white but still harbor bacteria. Always rely on a thermometer. If the internal temperature has reached 165°F (74°C) or has been held at 150°F (65°C) for sufficient time, it is safe to eat regardless of slight pinkness.
Should I butter-baste chicken breast for extra moisture?
Butter-basting adds flavor and richness, but it doesn't actually add moisture to the interior of the meat. The butter coats the surface, creating a delicious sauce and helping to brown the skin. If you want to use butter, do it in the last minute of cooking to avoid burning the milk solids. Combine it with aromatics like garlic and rosemary for a classic finish. For internal moisture, stick to brining and proper temperature control.